Last updated on March 13th, 2023 at 10:43 pm
Baking Makeup. You’ve probably heard the phrase, but might not be sure what it actually means. And why the heck to they call it “baking” anyway?
Let’s start with why. The reason they call it “baking” is because the technique uses your natural body heat to set your makeup. So it somewhat “melts” your foundation, concealer and powder into each other for a flawless look. You may think that baking is new because it’s currently so popular, but makeup artists have been using the technique for years.
The idea of baking makeup can sound really intimidating, but it doesn’t have to be!
Baking is great for setting makeup, above and beyond just a setting powder. Making your skin look flawless, brightening, and can even clean up makeup that’s gotten a little messy.
Baking Makeup: What You Need:
The three basic products you need for baking your makeup are 1) loose powder 2) makeup sponge and 3) fluffy brush. If you are concentrating on just your eye area, add concealer to the list.
You’ll want to use the makeup sponge because it will give you a more precise application for the powder than your normal powder brush would. You may also want to add a fifth product, a setting spray, to finish off the look.
Here’s How To Master Baking Makeup:
You’re going to want to bake during your makeup application at a point after you’ve applied your foundation/bronzer/contour and blush. Baking is adding an extra oomph to your foundation application, but it’s also going to clean up your makeup too. And anything that ended up where it shouldn’t have.
The Process
When doing your eye area, start with your concealer. You will want to apply your concealer first of course and then use your makeup sponge (dry) to make sure that the concealer is well blended. This is all a part of your “canvas” before applying the powder.
Dianne only does baking on her eye area, Jen likes to use the technique on her entire face.
Next, dampen your makeup sponge so it is just that, damp. You don’t want it too wet. Dip your makeup sponge into the powder and tap off any excess. There’s a good chance that this will be a little bit messy, and you will get some powder fallout on your clothes.
Wherever you decide you’re going to bake, stamp the power onto your skin. Don’t do a hard, dragging motion, because you’ll run the risk of disrupting your foundation.
The Baking
After application, you should clearly see the powder on your skin. This isn’t meant to be a light dusting of powder. Be generous with it! If your lines aren’t as crisp as you’d like them to be, go back in and add some more until you’re happy with it!
Now, you wait. How long you wait, is going to determine how intense your results are going to be. If you aren’t sure what to do, or it’s your first time, give it 2-3 minutes, and use a fluffy brush to get rid of any excess powder. But feel free to go check your emails and come back closer to 10 minutes too!
After you’re done with your makeup, make sure you use a setting spray to make your powder and the rest of your makeup look skin-like!
Jen’s Process
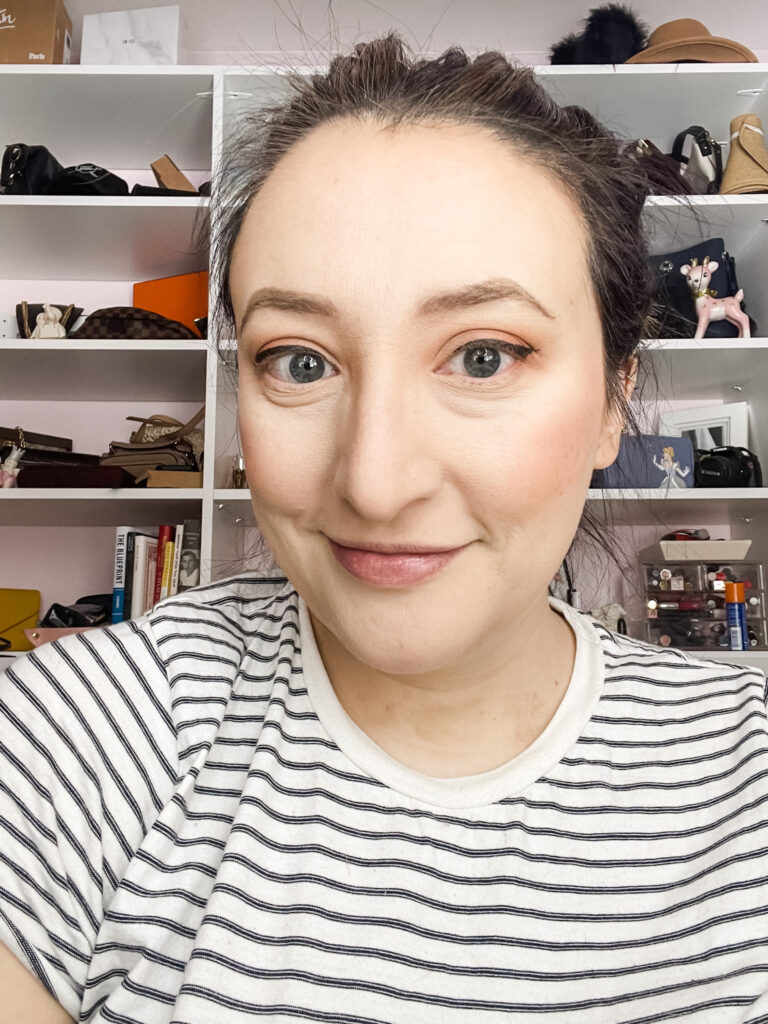


I don’t bake every time I apply my makeup. But when I’m going somewhere and want to feel “special”, I’ll take a little extra time and bake. I like to think doing my makeup is “me time”, and taking a little more time to bake is self-care.
While I’m working, I make a point to wear blue-light blocking glasses. My eyesight is terrible, so anything I can do to prevent additional strain, I will.
With that said, when I was going into the office (weird), I would do a little baking on the sides of my nose while doing my makeup.
I knew I was going to wear my glasses all day, so baking on my nose is a bit of a preventative step to keep my makeup intact.
I also have redness on my nostrils and a perpetual runny nose. So baking on the sides of my nostrils and a little bit even under my nose, helps to prevent my makeup from immediately breaking up and going away once I blow my nose.
I’ll bake when I want to make sure my makeup has a little extra staying power, in addition to when I want clean lines and extra brightness.
Recently, I started waiting to powder and set my foundation until after I’ve finished my eye makeup, at a minimum. I have a habit of scrunching up my forehead, so I give myself time to get my forehead scrunching out of the way before setting my makeup. Because if you set your foundation with creases, they’re not going anywhere!
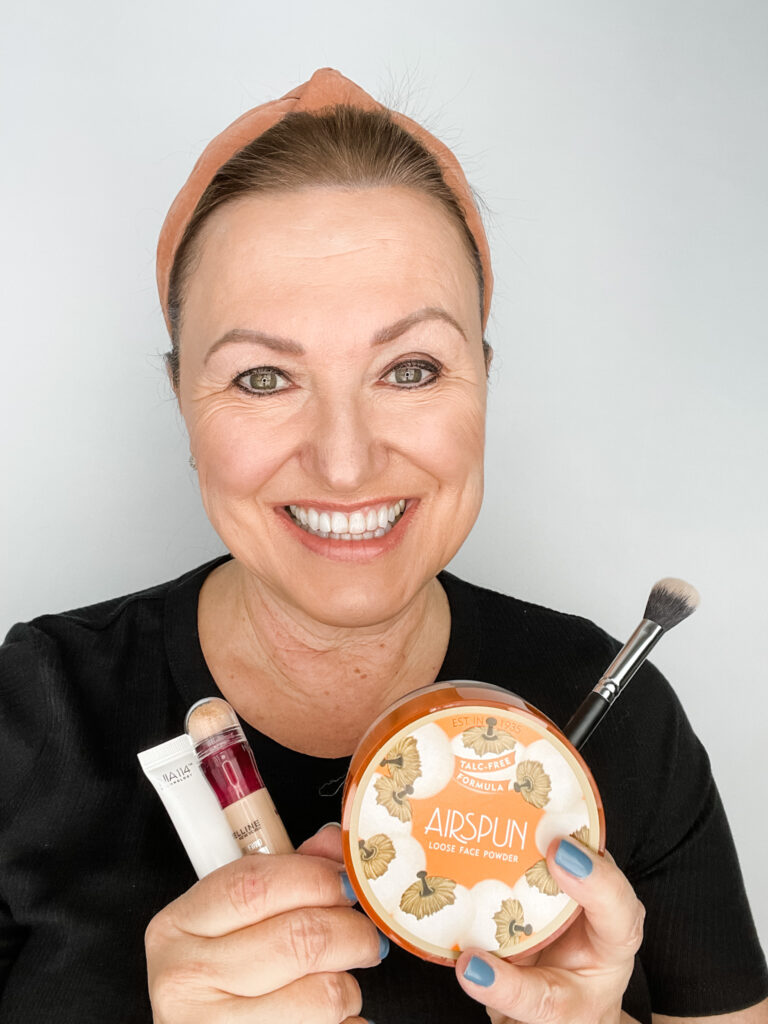
Dianne’s Process

The reason that Jen and I chose baking makeup for “Beauty At Any Age” is because we wanted to debunk any myths that you can’t bake your makeup after a certain age. If you’re 50+ like me, you may feel like baking may actually highlight any wrinkles that you have around your eyes, but that’s not true. Baking makeup is for anyone, at any age, who wants a finished, bright makeup look.
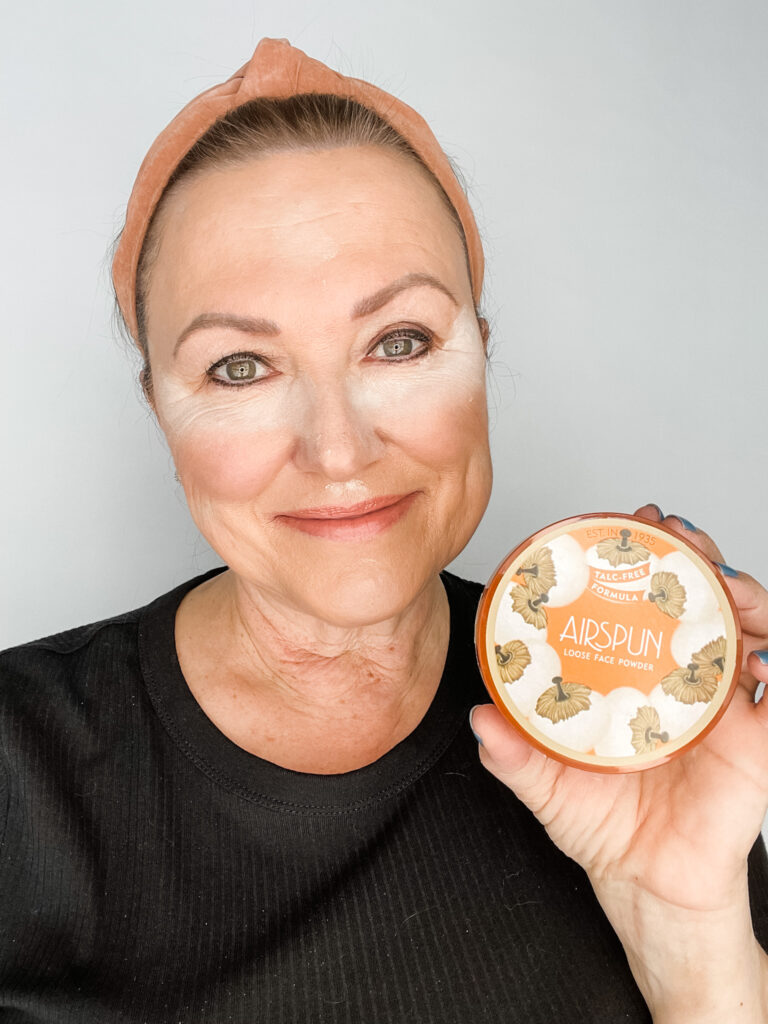
As we mentioned, I do baking mostly around my eye area. There is a important first step to getting the look you want. And it starts with moisturizing your skin, especially that eye area. When doing research about baking makeup, pretty much everyone stressed the importance of prepping the eye area with a good eye cream.
The one I am currently loving is Strivectin’s Intensive Eye Concentrate For Wrinkles PLUS. I have very sensitive skin and find that some eye creams irritate the fine skin around my eye. So far, so good with this product. It is rather pricey, but they do have a travel size for $15 if you want to give it a try.
There really is only one “process” for baking makeup, so mine is the same as Jen’s. It is the last thing that I do so that I don’t bake in “makeup face” as Jen alluded to!
In addition to my eye area, I will also do some baking down the side of my nose, cupid’s bow, and chin. I’ll also add a dot in the middle of my forehead for some brightness. Same as Jen, I only use baking for special events or photos. It’s not something I do every day.
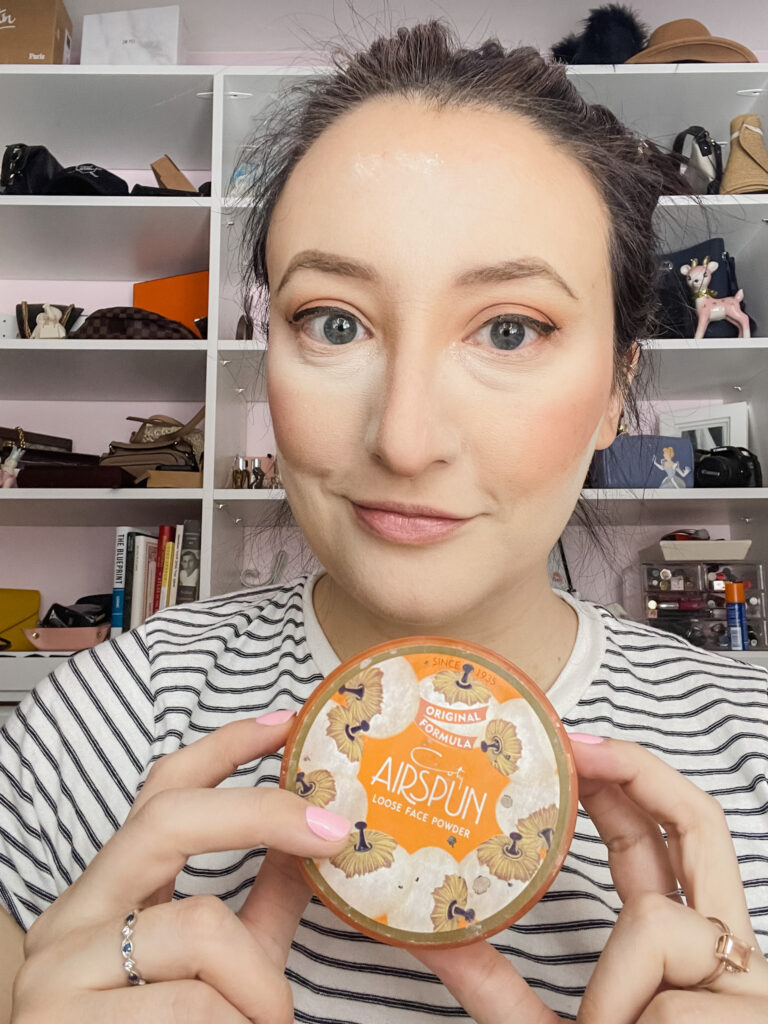
My products are also very similar to Jen’s. The biggest difference is that I use the “Extra Coverage” Translucent Power from Coty.
One Last Reminder
Before we close out this post, one reminder! Make sure you keep your makeup sponge (and all makeup tools) clean. Especially if you use your makeup sponges wet – they can be a breeding ground for bacteria. What I actually do is wash my beauty blender before I use it. That way I know it’s clean before it touches my face.
We did an entire post on “How to Clean Your Makeup Brushes”. It includes the best products and techniques to keep your brushes in great shape.
Have you tried or will you try baking makeup? Let us know in the comments below!