We’ve chosen “How to Apply Foundation” for Volume 5 of our “Beauty At Any Age” series. We actually had some requests for this topic, so we hope we answer all your questions.
How to apply foundation is great topic to talk about at any age. Our skin does change over time so the foundation or even the way you’ve applied it in the past may need to be altered. So read on to see how we both approach wearing foundation.
**This post contains affiliate links and we will be compensated if you make a purchase after clicking on our links. However, we only recommend products that we truly love. Amazon prices are as of 2/6/23.
How to Apply Foundation
Last year we did a HUGE post on different kinds of foundations, formulas, finishes and finding the right one for you. Refer back to that one if you need some help finding the right one for you!
But keep in mind, you don’t need a super heavy foundation. Something with a light to medium coverage is going to be perfect for everyday wear, or even full coverage if you apply it properly. Full coverage foundations can look cakey really quickly, so you have to be careful.
Before even starting your foundation, you need to make sure you’re taking care of your skin first! Make sure you’re exfoliating, moisturize, use primer, and make sure you’re drinking plenty of water!
The bottom line is, if you aren’t taking care of your skin, you’re going to have a really hard time making your foundation look good!
Jen’s Foundation Process
I’ve had a lot of different favorite foundations over the years, but here are the ones that rise to the top of my list:
- MERIT The Minimalist Perfecting Complexion Foundation and Concealer Stick
- Lancôme Teint Idole Ultra Wear Care & Glow Foundation with Hyaluronic Acid
- Undone Beauty Unfoundation Light Coverage Glow Tint
- Wet n Wild PhotoFocus Stick Foundation
Unfortunately for me at the moment, I’ve made my descent into full-on winter pale, so a couple of my foundations don’t totally match me at the moment.
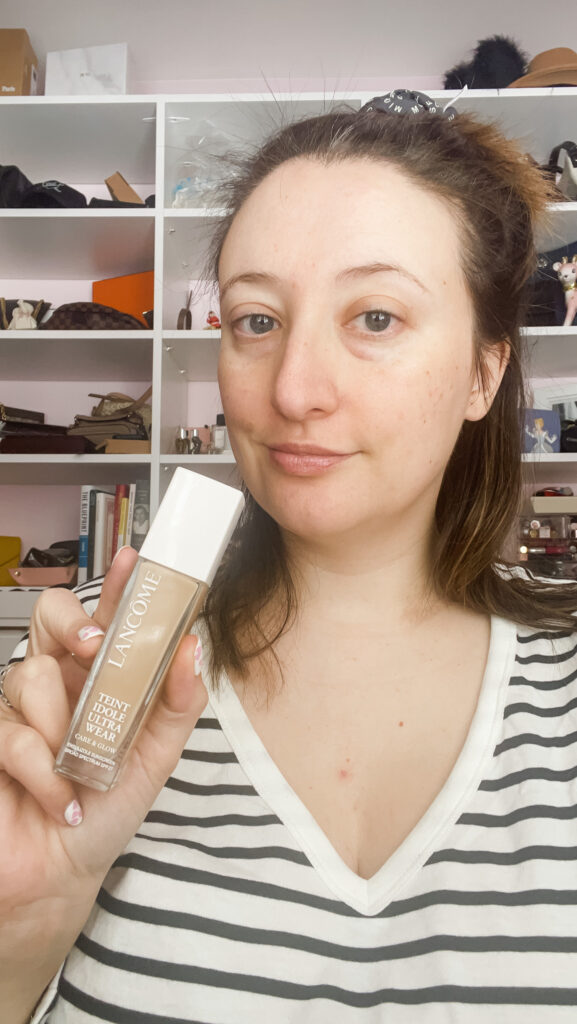
My current favorite is the Lancôme Teint Idole, which I got via Influenster (that anyone can sign up for!). The shade I picked is totally wrong – I must have been dreaming about my fake summer tan. But, with my L.A Girl Pro Mixing Pigments I’ve been able to experiment to get a shade that’s a SUPER close match.
This is a serum foundation, with hyaluronic and mandelic acids for a natural and glowy finish.
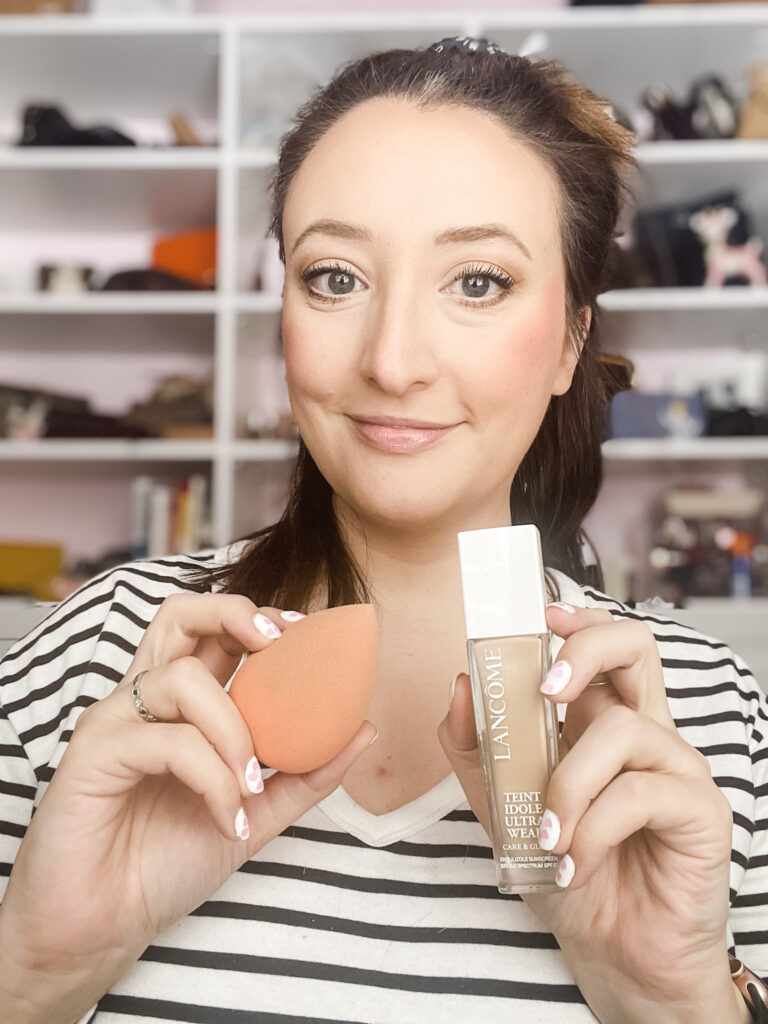
With this foundation, I prefer using a makeup sponge for picking up the product from my mixing palette and for application. Using a makeup sponge will give you a little bit lighter coverage. Make sure you’re “bouncing” the product into your skin for a smooth finish.
I also like using a makeup sponge with the Undone Beauty foundation as well.
With stick foundations, my favorite way to apply is adding the product to my face, spritzing with MAC Fix+, and then using a makeup brush to essentially push the product into my skin. Regardless of how you’re applying, try to not move the product around too much (like swirling a brush on your cheeks for example), to prevent the foundation from separating and creating patchy spots.

I like to let my foundation dry for a little bit before I powder, to lock everything in. I also try to not scrunch my face up too much so the foundation creases.
Easier said than done though, because I scrunch my forehead up all the time, especially when I’m putting on my eye makeup.
Right before I’m ready to powder, I’ll use my makeup sponge or brush with a little bit of Fix+ to touch up the area again and try to get some of those pesky creases out!
Dianne’s Foundation Process
Sometimes it’s hard for me to believe that I used to have oily skin. And if you told me that I would miss it someday, I would even be more surprised. But here we are. I’ve had to change my process for how to apply foundation as a result.
Age has brought some “blotchiness” to my skin and unfortunately, has not taken the pimples away!

As we mentioned above, prepping your skin is really the most important step in how to apply foundation. After I wash my face, I use a toner, followed by a moisturizer. I do play with different moisturizers and the one that I am loving right now is Elizabeth Arden’s Ceramide Premiere Intense Moisture and Renewal Activation Cream Broad Spectrum Sunscreen SPF 30 during the day and it’s “sister”, Ceramide Premiere Intense Moisture and Renewal Overnight Regeneration Cream in the evening.
Both of these moisturizers are a little pricey, but I really like the results. I have issues with dryness and “blotchiness” (as you’ve seen above) and I feel that these two creams are really helping. They are a little heavier, but they work for my skin. And I love that the day cream includes SPF.
My other favorite product is Laura Geller’s Spackle Skin Perfecting Primer. I’ve experimented with different primers but I always end up back here. There are different versions of the primer and I have a couple, but I use the “Hydrate” version to most. I am wearing it in the photos below, but I don’t use it every day. I use it more for special occasions and photo shoots, but there’s no reason why you can’t wear it every day if you’d like!
My Foundation Application Tools
Last thing – the foundation applicator. I go back and forth between using a foundation brush and my Beauty Blender. My foundation brush is my “go-to” most days and my beauty blender, again, I use for special occasions and photo shoots. I like how the Beauty Blender application looks better, but it takes longer and I feel it uses more foundation, so I use it less frequently.
As Jen mentioned above, when using a sponge/Beauty Blender make sure that you use a “bouncing”/dabbing motion when applying. Don’t spread foundation with the beauty blender. The other key thing is to make sure to wet the sponge before using – you definitely want to use it wet, not dry.
When I use both the sponge and the brush, I pour a small amount of foundation on the back of my hand and then dip into that before applying to my face. I start small and add more foundation as needed.
Also, make sure your brushes and sponges are cleaned on a regular basis. We wrote a blog post on that topic as well: Cleaning Your Makeup Brushes: The How-To and the Why.
My Favorite Foundation
So, what foundations do I use? For the most part, I use only ONE! After years of trying different foundations, I have settled on Estēe Lauder Double Wear Foundation. It’s a liquid foundation with matte finish that gives you medium to full coverage. I love the finish and “my” shade is a perfect match. I can use my shade all year long as well as I really try to stay out of the sun, so I don’t really have much need to change shades in the summer. There are different products within the Double Wear line, which I will list below.

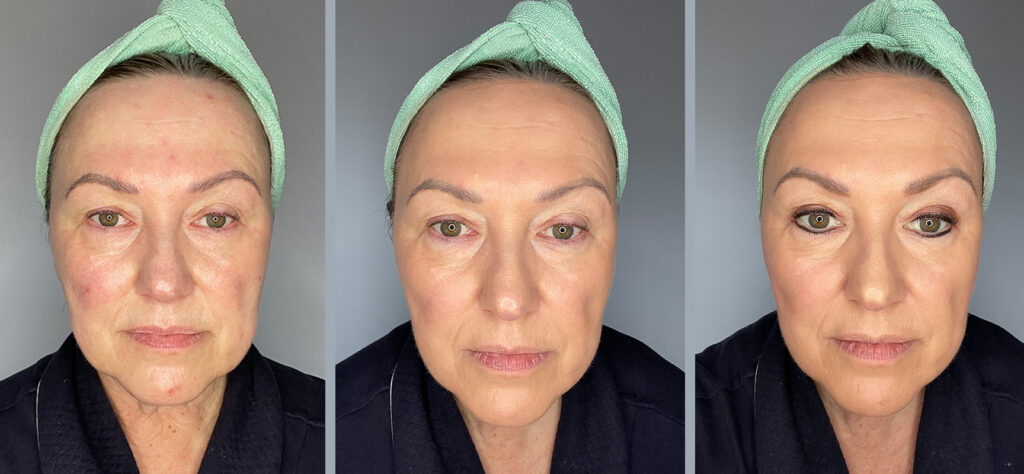
As you can see below, after applying foundation, I still have a little bit of blotchiness. But as you’ll see, as I add blush, concealer and highlighter, the blotchiness diminishes. But it’s a good first start and the texture of my skin looks much better in general.
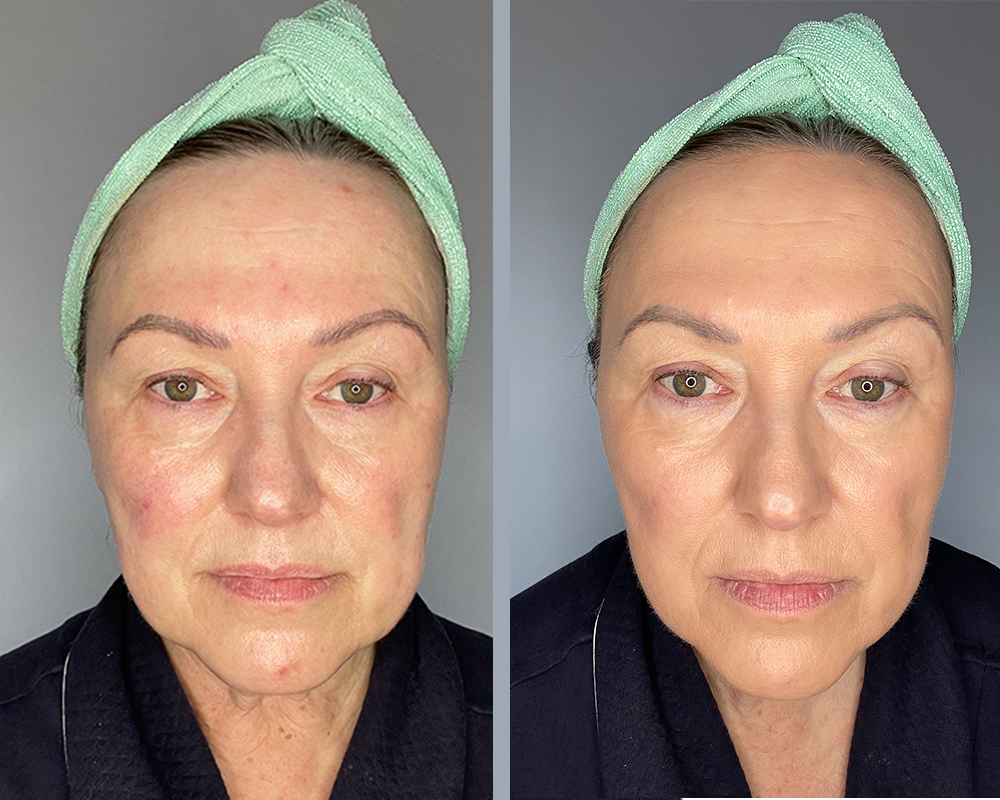
Once I add the my eye makeup, blush, concealer and highlighter, my skin starts to take on more of a glow. Currently I am not using a powder to set my makeup, but I do use Charlotte Tilbury Airbrush Flawless Setting Spray.

Hopefully we answered your questions on how to apply foundation. But if you have more, please let us know in the comments below.
And, have you signed up for our Newsletter yet? It’s only published twice a month with exclusive content you can’t get anywhere else on our website. Sign up for the newsletter!