Last updated on January 9th, 2023 at 12:14 pm
Here we are with “Beauty At Any Age Volume 3”. Beauty at any age works just like our “How to Wear it at Any Age” series. We both share our beauty tips on a certain topic from our different perspectives: this edition is all about the best false lashes.
**Please Note: This post contains affiliate links and we will be compensated if you make a purchase after clicking on our links. However, we only recommend products that we truly love. Amazon prices are as of 12/3/22.
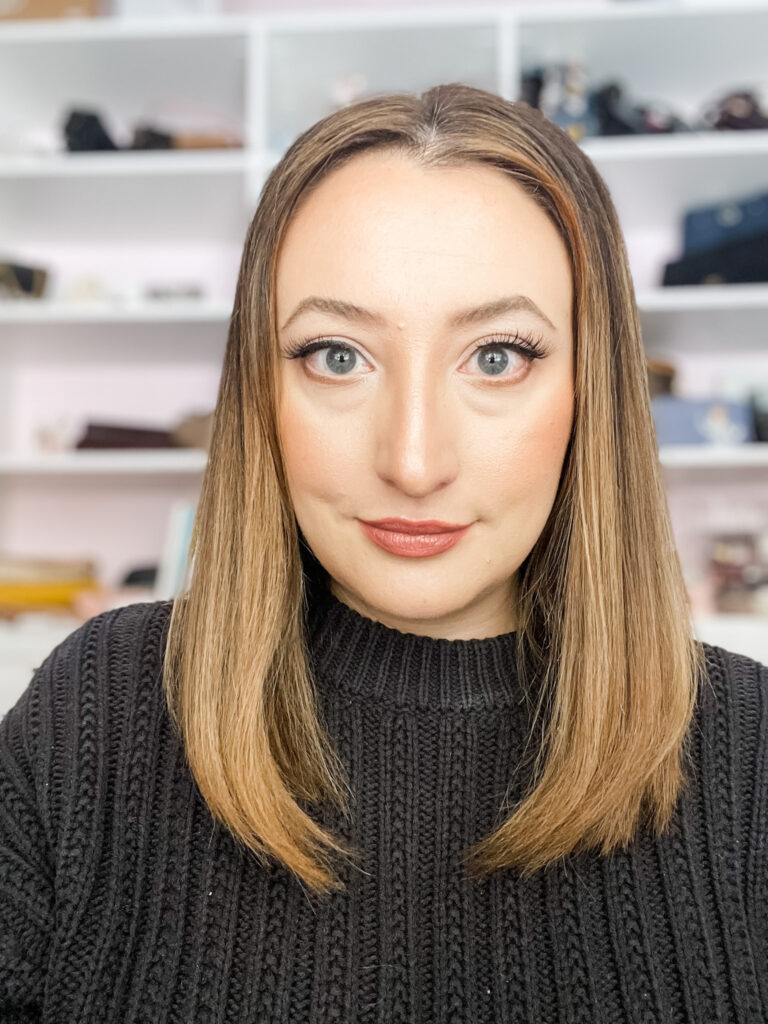
BEAUTY AT ANY AGE VOLUME 3, FALSE LASHES: JEN
I’m not an everyday false lash wearer. Love wearing them for photos, or when I want to feel extra glamorous – like when attending a wedding.
I think back to my bridal shower when I tried to apply individual false lashes, and it was a nightmare. I’ve come a long way in six years!
Applying and wearing lashes can be tricky, but with some practice you’ll be putting them on like a pro!
While doing your makeup, an easy way to “hide” that you’re wearing false lashes, is by having thicker eyeliner. This is going to disguise the band, if they’re applied a little wobbly or if you’ve got some glue smudges.
If you’re new to wearing false lashes, try finding a “natural” pair with a thin band. The bigger the lashes, and the bigger the band, the more you’re going to feel them.
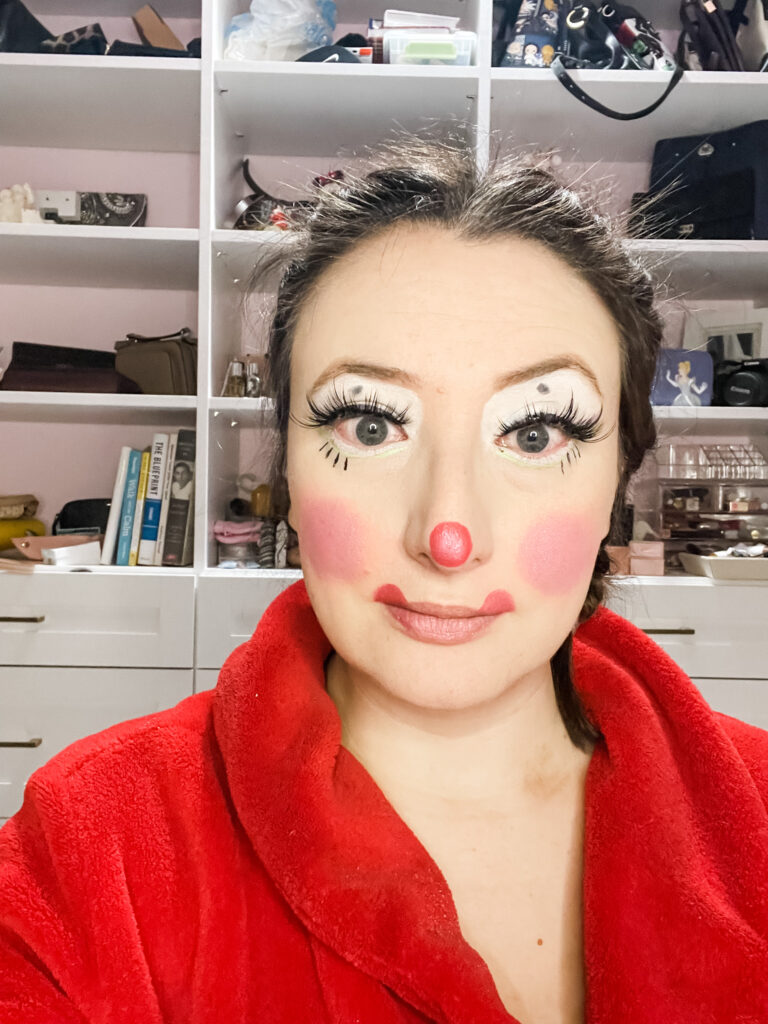
I wore a larger pair with my Thanksgiving Clown costume, and I could definitely feel them. From when I put them on at 4am (yep), to when I took them off at 1pm.
Once you have your lashes, glue, a mirror and your choice of an application tool (I use tweezers), you’re ready to go!
Here’s my picks for each!

Take each lash out of the package, and measure them against your eyes. If you strictly follow your lash line, and your lashes are too long, your eyes are going to look droopy.
I have round/almond-ish shaped eyes, so I cheat a tiny bit and at the very outer corners I glue my lashes going upward slightly vs following my lash line. But, this is a more “advanced” trick, so try it when you feel more comfortable applying lashes!
Using a small pair of scissors, trim any excess as needed.
Curl your lashes, so they blend in more easily with the falsies!
Holding onto your first lash with either your fingers, tweezers or a lash placement tool, apply lash glue. I always make sure I have an extra little dollop on the inner and outer corners, because those are always the first to pop up.
Now, WAIT! DO NOT try to put on the lash immediately after applying the glue. The lash won’t stick, and you’ll get glue everywhere. I wait anywhere between 30 seconds to a minute, to give the glue a chance to dry and get a little tacky.
If you can, take your mirror and adjust it so you’re looking down slightly. Not directly into the mirror and back at yourself.
Using your tool of choice and lash, place it along your lash line. If you’re using tweezers or your fingers, hold the lash in the middle, and place it in the middle of your eye. Pause for a moment, and make sure it’s in the right place and stays. Move to holding the outer edge and then the inner edge in place for a couple seconds.
At this point, I’ll finish up my hair, brush my teeth, something just to give my lashes time to fully dry down.
Last couple steps and then you’re done!
Touch up your eyeliner if needed, to hide any spots where some glue smudged, or if you just want to make the line thicker.
For mascara, there’s two different opinions on when to apply. Some people say to apply mascara before lashes. Personally, I like to put on mascara after applying lashes and everything has dried, to really blend real and fake lashes together.
For me, I found if I applied mascara beforehand, my lashes sat on top of each other, instead of looking blended like I want.

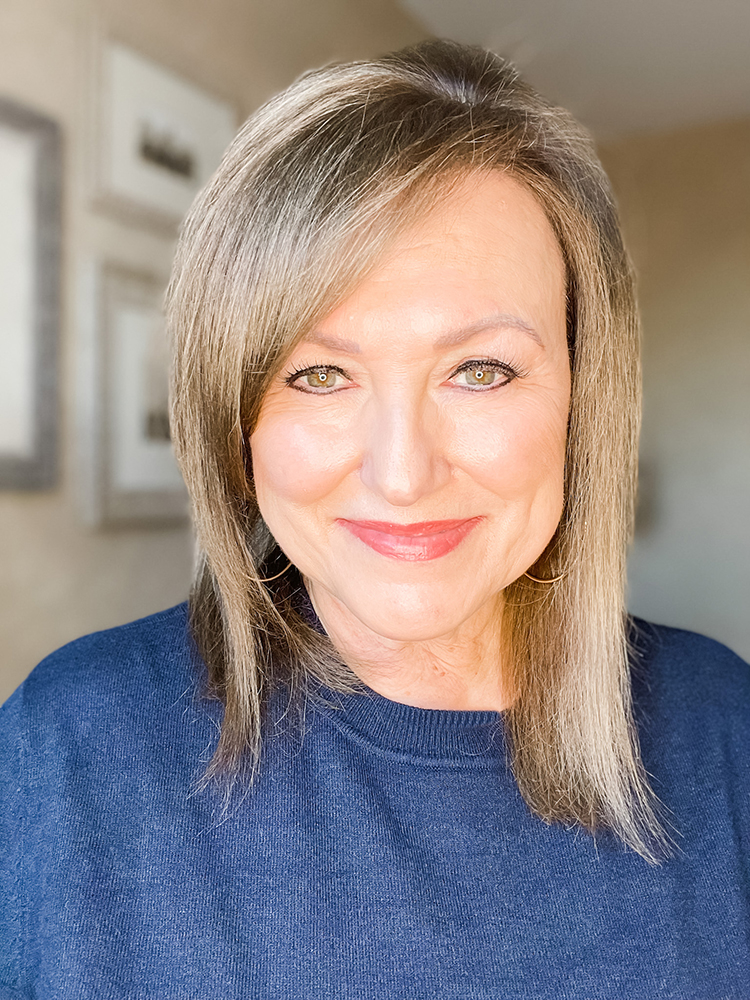
FALSE LASHES: DIANNE
My first parlay into the world of false lashes came at my oldest stepson’s wedding in 2017. Prior to that, believe it or not, I never tried wearing them because I was intimidated by the process.
I visualized them falling off in the middle of the ceremony. So, I went with lash extensions! I loved my extensions. It was wonderful to wake up in the morning with a full set of lashes, but there are some downsides. The first is that they are costly and only last a few weeks. The second is there are some limitations, like not being able to put your face under the shower.
My natural lash choices and glue:
So, I didn’t continue the extensions, but did them one more time for my middle and youngest stepson’s weddings. They they were only two months apart so that made it easy. After that, I decided I needed to get a “handle” on applying false lashes, especially for photo shoots for the blog.
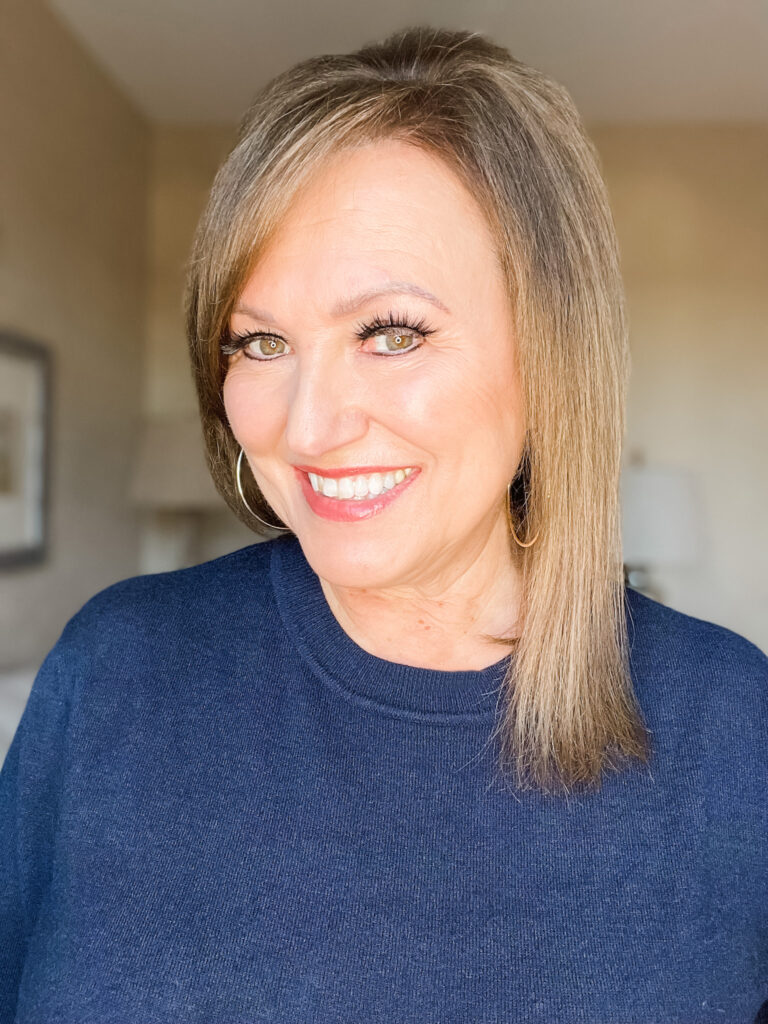
So, I’ve really only started wearing false eyelashes consistently for the last two years. I’ve experimenting with different styles from “natural” to “wispy” to “max”. I should mention that my natural eyelashes are unfortunately pretty skimpy. So even the most natural lashes can make a pretty big difference for me. I’ve worn those just out to dinner with friends and feel that my eyes look brighter, but without anyone really noticing.
For our photo shoots, I will use some fuller lashes, which is what I would recommend if you are taking photos. I will say that you can go a little bolder than you think. They don’t show as heavily as they may look in the mirror to you.
My fuller lash choices:
As far as my process goes, it’s pretty much the same as Jen’s, but I do have a couple of differences that I will share below.
The first is when I apply my lashes and I prefer to do it when I am done with everything else. Part of the reason is because I have bangs and when I dry my hair after I put lashes on, there is a chance that my hair can get stuck to my lashes (it might have happened once). So, I wait until the end. But it’s really a personal choice.
For me, I like using a clear lash glue. That way if they smudge a bit, you can’t really tell. I especially recommend this for when you are first starting out. The clear glue is a little more “forgiving”.
The last thing is when to apply mascara – before or after and I have done it both ways. I do a little bit of a hybrid in that I use a small wand mascara and do a light layer just so I can see them (they are that skinny). Once my lashes are on and dry, I add a full layer of mascara.
I do use my fingers as opposed to tweezers too. I think if you can manage the tweezers, it would be better. If you don’t use tweezers you can get glue on your fingers and that can cause some problems when applying the lashes. I am working on improving my technique.
And that’s the key with false lashes – it can be frustrating at first, but stick with it. There are days they go on with ease and other days where I’ve had to thrown one away and just start over. Try different methods until you find the one that works for you.
I would recommend trying them several times before you have a big event. Most lashes can be used up to five times, so it’s worth it to use one pair for practice until you really need to wear them for an event.
Is there a topic you’d like to see us cover for “Beauty at Any Age”? Let us know in the comments below.