Jewel tone eyeshadows are on trend this season and the one we love the most is the emerald eyeshadow look!
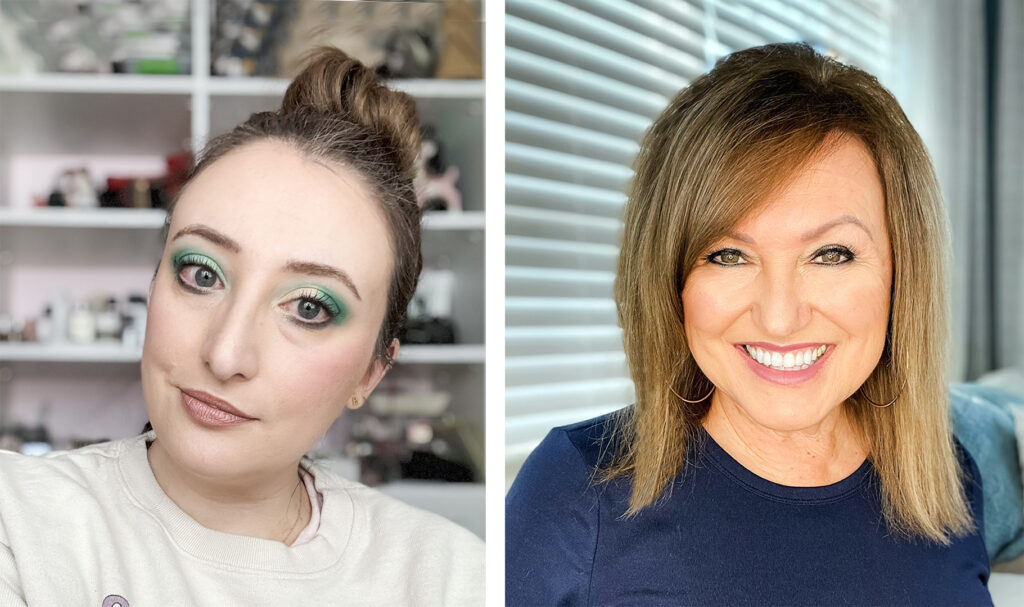
If you’ve been following us for a while then you already know that Jen is a little more adventurous in her makeup. And that’s not age-releated. Jen has always been that way. Starting back when our mom/grandma let her try out her lipstick. Dianne has always loved makeup but always been a little more conservative. But one thing is true for both of us: We love to try new trends and looks!
So, here are both our looks for the latest trend: emerald eyeshadow. We’ll start with Dianne’s look, since it’s a little more traditional. But don’t miss Jen’s great look. It may look intimidating, but she walks you through step by step. You can definitely recreate her look.
**Please Note: This post contains affiliate links and we will be compensated if you make a purchase after clicking on our links. However, we only recommend products that we truly love. Amazon prices are as of 2/20/23.
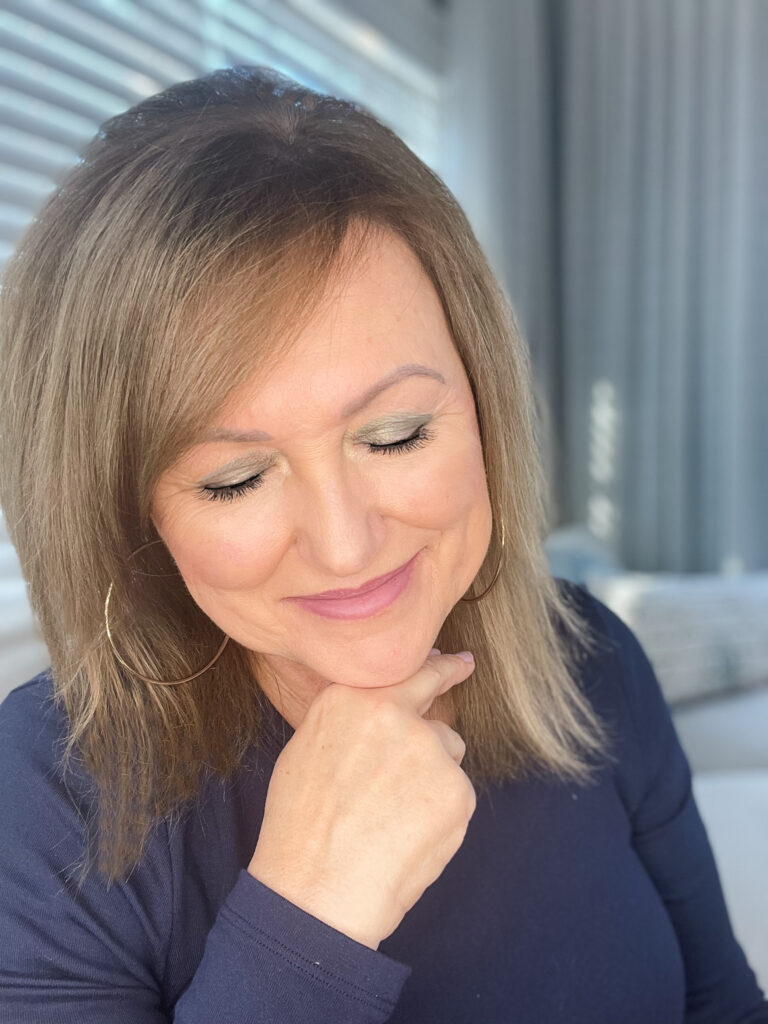
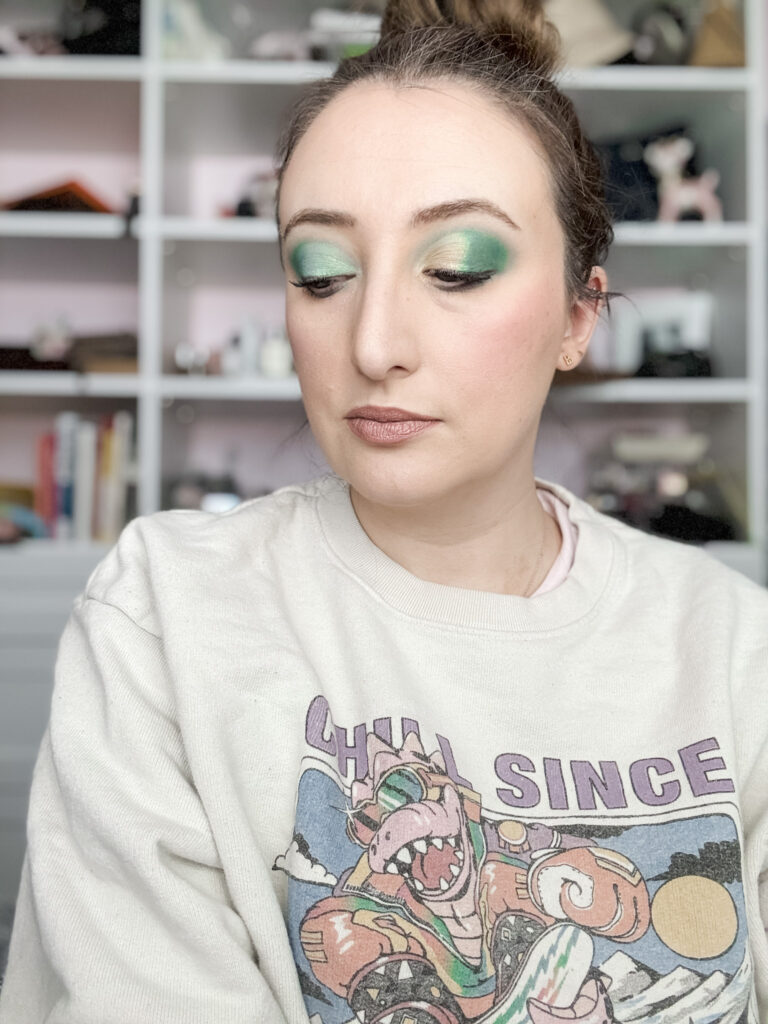
Dianne’s Emerald Eye Shadow Look
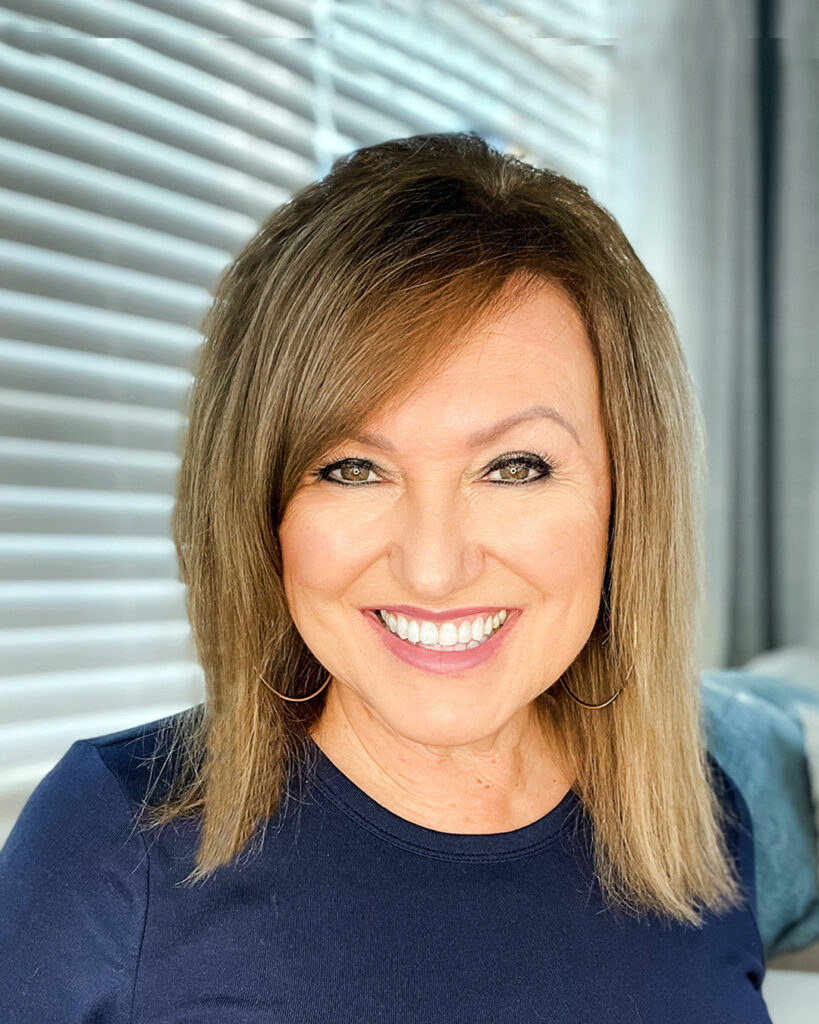
I will be the first to admit that I have a little bit of trouble getting a great photo of my eyeshadow looks. Part of that reason is that I am a little more conservative in my look. So that it doesn’t easily show up in pictures. But, I do love how this emerald eyeshadow brings out the green in my hazel eyes.
Let me walk you through how I used the palette we selected from Makeup Revolution:

My Application Steps:
Step 1: I first used a flat eyeliner brush using “Mist” to create a line on my upper and lower lashes. I took my time to make sure that the color was clearly visible. I extended the line on my upper lashes because I wanted it to be above where I was planning on applying my black eyeliner. It’s extended out a little bit, not quite a cat-eye, but just a small extension
Step 2: Using “Candyland” was my next step, as I used a fluffy eye shadow brush to apply that all over my lid.
Step 3: I next went back to “Mist” and applied in my crease with a small, flat eye shadow brush.
Step 4: Next up is my eyeliner. I really love Charlotte Tilbury eyeliners and my every day shade is “Barbarella Brown”. But for this look, I wanted a little more smokey effect, so I went with “Bedroom Black”
Step 5: As a final touch, I used my pinky finger to add just a touch of “Acapulco” in the inner corners of my eye.
Step 6: I applied my favorite mascara – It Cosmetics Super Hero mascara. It’s followed by a natural set of false eyelashes (Eylure #031).
Step 7: I finished my look with mauve lipstick. My favorite shade is no longer available, but the shade I am sharing below is very close. My blush is Anastasia Stick Blush in Soft Rose.
And there you have it! Very easy to follow and a look that’s not over the top.

Jen’s Emerald Eyeshadow Look
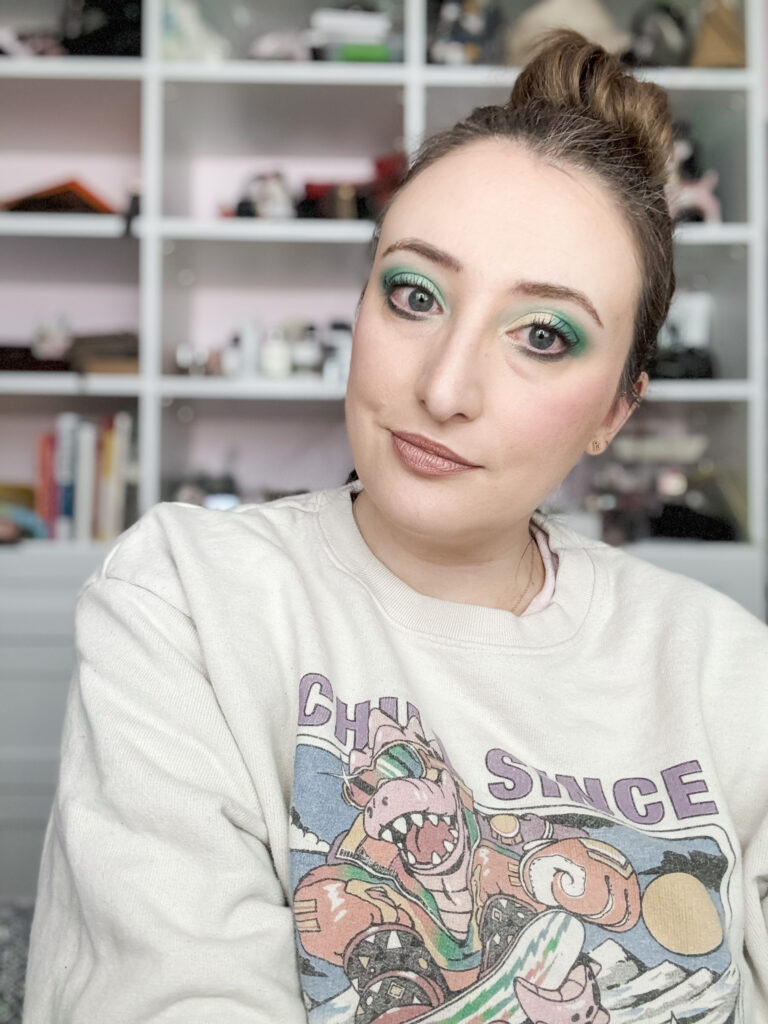
I’m all about trying a colorful smokey eye, like I did with the Oxblood shadows! So let’s take it one step further with a cut crease.
This is more of an intermediate level, but you can do it!
Follow the steps for a smokey eye, and stop when you’re happy with the color payoff in your crease. And then maybe add just a smidge more.
Now for the intermediate part! Get a flat concealer brush and concealer. Liquid will be the easiest, but try to use what you have.
First, you’re going to put just a dot of concealer on your eyelid, closer to your lash line, and open your eyes. This is how high you’re going to take your concealer. There’s a good chance it’ll go past your crease, and that’s ok!
Starting at the inside of your lid, sketch a line all the way up to where that dot of concealer is.
From there, apply more concealer to your lid between your lash line and the line you just drew at/above the crease.
You don’t have to extend the concealer all the way to the outer edge of your lid, you can go to the center of your lid and blend a little extra shadow to hide any harsh lines.
The next step is up to you and how bold you’re feeling! Using a flat brush, pack a different eyeshadow onto the area with the concealer.
You could use a creamy beige shade, a shimmer in a similar shade, or a different shade of glitter. All would be totally gorgeous!
I did both eyes exactly the same all the way to this step. Then I did one eye with a shimmery gold and one with a shimmery green!
Then, using a small brush and a little bit of the shade at the outer corner, blend just a little bit where the concealer/eyeshadow meets the rest of the look.
With a beige lid, I would add a little bit of liquid liner and maybe some brown eyeshadow along the lower lash line.
Anything bolder, I would put green under the lower lash line and just a little bit of eyeliner for some definition.
Make sure you apply a ton of mascara or false lashes to bring the look together!
If you liked this post, you will love our post “The Best Eyeshadow for Your Eye Color”. And make sure to check out our entire “Beauty At Any Age” section.